Tutorial 3D Thanksgiving Place Holder Treat Box
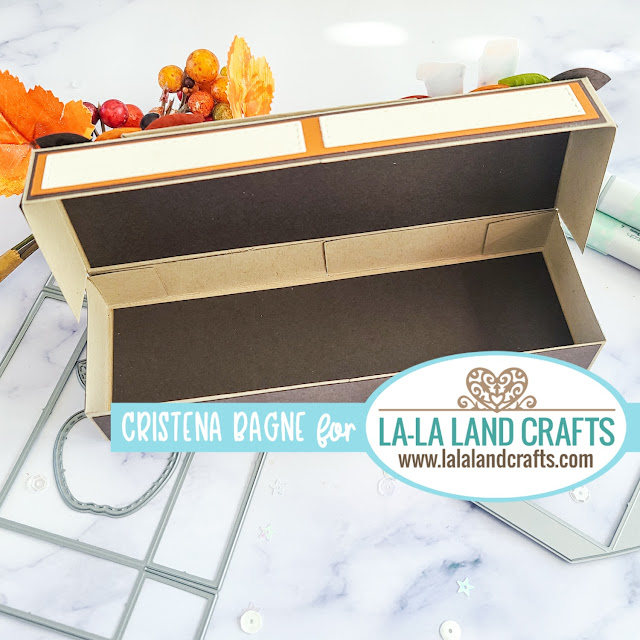
You then have the box that opens up like a flip-top box instead of having to take the entire top of the box off. Which you can put any kind of little gift or treat inside the box for after dinner.
Luka was fun to color. He is one of the images that I used to color in my classes that I teach online at The Copic Academy. We were practicing clothing and different patterns on shirts.
The Copic Colors I used are:
Skin: E000, 00, 04, 11, 21
Hair: E23, 21, 25, 27
Jeans: B91, 93, 95, 97, 99, E21, White gel pen
T-shirt: Yr21, 23, 24, 27
Shirt: C0, 2, G24, 28, 21, YR24, white gel pen
| You will need to cut the following: Early Espresso Paper: (4) 6 7/8 x 2 1/4 (3) 6 7/8 x 7/8 (4) 2 1/4 x 7/8 Die Cut: (5) leaves from the Club La-La Land Crafts Apple Die (1) stem from the Club La-La Land Crafts Apple Die Cajun Craze Cardstock: (2) 6 3/4 x 3/4 (1) 6 3/4 x 2 (2) 2 x 3/4 DieCut: (1) Horiztonal Pocket Die large rectangle cover (5) leaves from the Club La-La Land Crafts Apple Die Vanilla Cardstock: Die Cut: (4) Suitcase Box Die long side panels (2) Suitcase Box Die short side panels (2) Suitcase Box Die top panels (1) Horizontal Pocket Die small rectangle covers (1) 3rd largest Double Stitched Rectangle Die Crumb Cake (kraft) cardstock: (1) Horizontal Pocket Die base (1) 3rd largest Scalloped Rectangle Die Old Olive cardstock: (5) leaves from the Club La-La Land Crafts Apple Die Pumpkin Pie cardstock: (5) leaves from the Club La-La Land Crafts Apple Die Soft Sea Foam cardstock: (1) Apple from Club La-La Land Crafts Apple Die |
Now onto the tutorial!
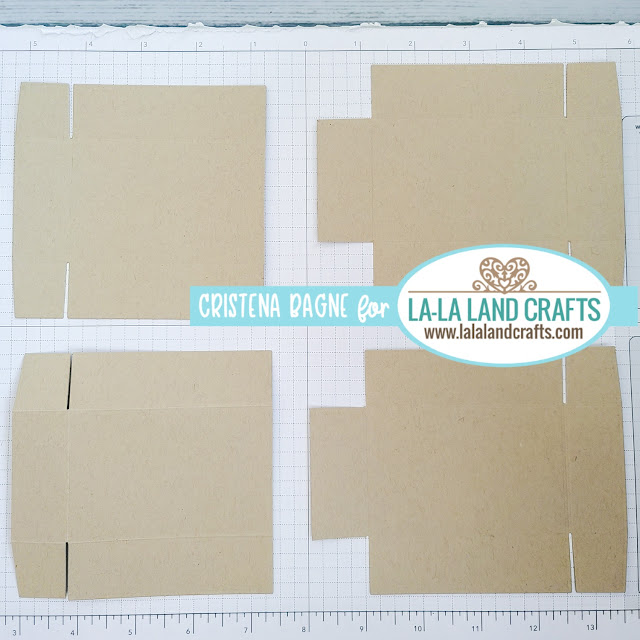
1.You will start out by cutting 4 of the Suitcase Box Die from Crumb Cake (Kraft) cardstock
2. As shown in the photo below - you will cut the right side flap off two of your boxes
2. As shown in the photo below - you will cut the right side flap off two of your boxes
3. Cut just the small corner flaps off the other two boxes as seen in the photo below
4. Place tear tape on the leftover flaps of the two boxes that you cut only the small flaps off of as shown in the photo.
5. Remove the white protective strips from the tear tape and adhere to the boxes together as shown.
You will adhere the boxes you cut the right flap off completely to the boxes with the tear tape. I have kept the photos with the boxes in the same position so you could see what I did.
6. Cut the small corner flaps off only one of your new longer boxes, as shown in the photo (look at the bottom box in the photo) This will be your lid.
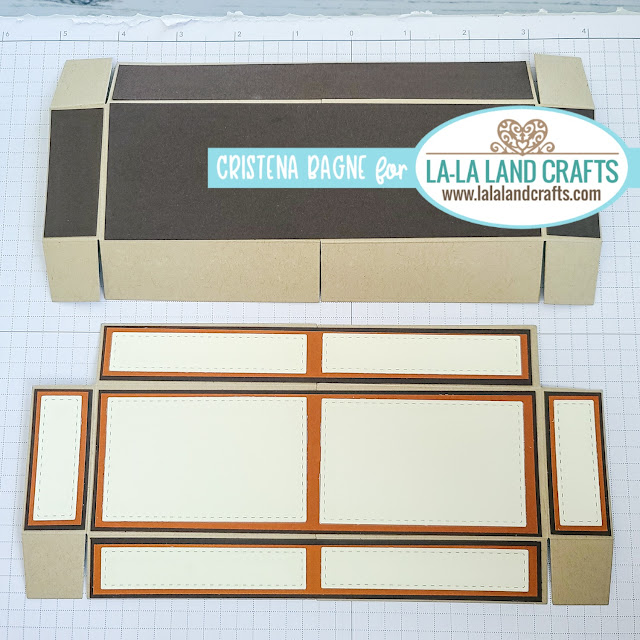
7. Adhere the Early Espresso cardstock that you have cut in the places as indicated in the photo.
Your lid will get 2 of the 6 7/8 x 7/8 strips and your bottom one will only get one as your lid will be covering the spot that gets nothing.
8. Adhere the other (2) 6 7/8 x 2 1/4 Early Espresso cardstock on the inside of the boxes. This will make the box look clean and make it more stable.
9. Adhere the Cajun Craze cardstock only on your lid piece.
We don't add anything to the bottom part of the box as it will just make the bottom thicker and harder to open and close. The brown that we have added is just to make it look cleaner and make it more sturdy.
11. Place tear tape on all the small corner flaps and along the long flap that has remained uncovered on the bottom of the box.
12. Take the white protective paper off the tear tape covering the small corner flaps and create your boxes as shown in the photo.
13. Remove the white protective paper from the tear tape along the backside of the bottom box and adhere to your lid.
TIP: Do not adhere it directly up to the scorelines. This will make it easier to close and open.
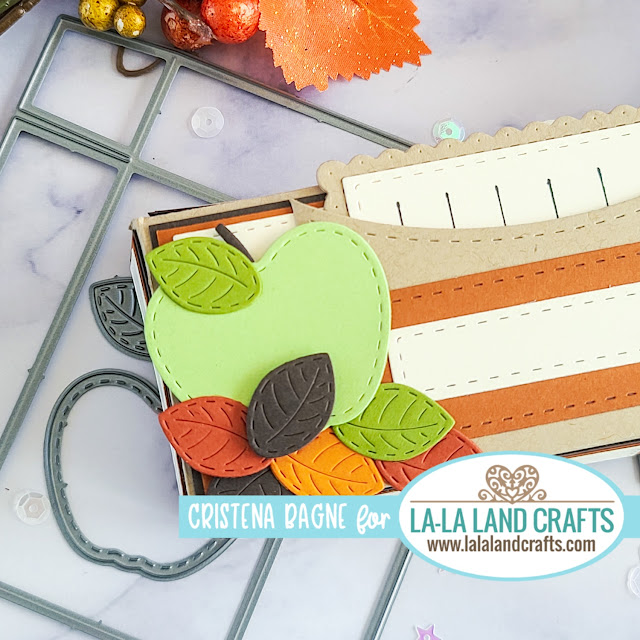
The apple is off to the left side and the leaves are put on completely random.
If you like the way I color and would like to learn from me, come join Copic Academy!
Here are the supplies I used for the card:

I hope you enjoyed my post today. Don’t forget to go and see the rest of the team’s creations over at the LaLa Land Crafts Blog. Don’t forget you can also find great inspiration over at the LaLa Land Crafts Facebook Group and on Instagram as well.
Until next time friends!!

Don’t forget to follow me on Instagram, YouTube, Pinterest, and if you want to connect with me, even more, come see my facebook page!


Comments
Post a Comment
Thank you so much for your kind comments!