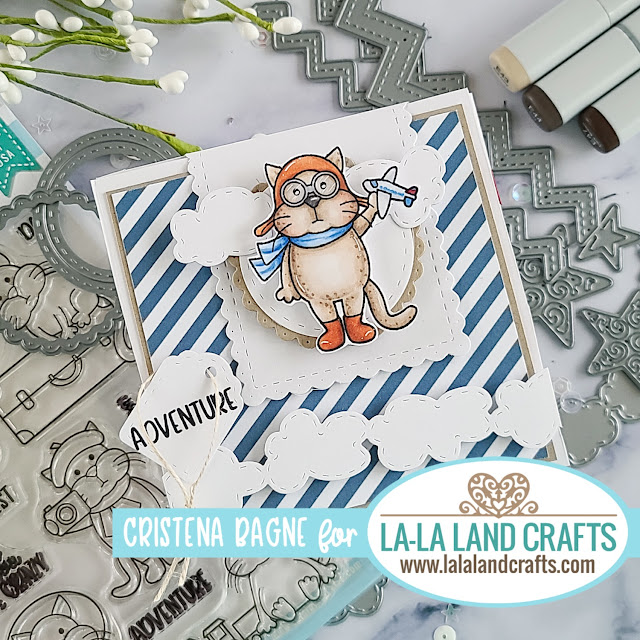
TUTORIAL Triple Fold Surprise Card / Traveling Cats
Hey all! Happy Friday! Tutorial Alert! Triple fold surprise card is in your future YAY!!! For today's theme, I am using Traveling Cats Clear Stamp Set. The theme for the La-La Land Crafts design team is Encouragement. I am so happy to be doing this theme as I feel it is much needed not only in the current world we are living but just in normal everyday life as well. So I just had to make a tutorial for you. This card I made for my son who is starting to worry about his future.
I used the Traveling Cats Clear Stamp Set because these little cats have everything my son has said he is interested in being when he becomes an adult. I want him to know that he can be whatever he sets his mind to.
I just love this little pilot cat! I have set him upon the Pierced Scalloped Circles and the Double Stitched Circle Dies. You can see in my video tutorial at the bottom of my post how I did the Scalloped Rectangle Die at the top of the card. I also love the Row of Clouds Die for this little pilot cat, the die is perfect!
When you open the card by lifting the little folding flap the pilot cat is on, this is what you will see. A little train cat and the travel label from the Luggage Tag Die. At the top of this part of the card, you can see the Stitched Zig Zag Die which brings another fun texturized element to the card. It really brightens it up with the red cardstock.
I just love these little cats and can't get enough of them.
When you open up the Stitched Zig Zag Die folded flaps you find this cute little astro cat with a space waiting for you to write a nice message.
I also added some gold Filigree Stars Dies to the sides. I think they look really great with this wee little cat. I did end up giving the card to my son, Stephen. I think I got the biggest hug I have gotten in years. It's an amazing feeling seeing the sign of relief and the smile someone gives you by just telling them "everything will be okay".
If you like this card and would like to know how to make it, you will find the video tutorial at the bottom of this post. You may have already seen it on my YouTube channel or on the La-La Land Crafts blog as well yesterday.
The Copic markers I used are:
Astro Cat: E40, 41, 42, 43, R20, 30, 29, 17, 05, B24, 23, 21, 26, N0, 1, 2
Pilot Cat: E40, 41, 42, 43, R20, 30, E99, 97, 95, B21, 23, 26, R29, N0, 1, 2
Train Cat: E40, 41, 42, 43, R20, 30, 29, 17, 05, Y23, 26, B26, 24, 21, G24, 21, 28, N0, 1, 2
If you like the way I color and would like to learn from me, come join Copic Academy!

I hope you enjoy the tutorial that I made for you for this card.
PAPER CUT & SCORE
White cardstock: (1) 12 x 12 Scoring: 2, 4, 8, 10 Flip score @ 4, 8
(1) 3 5/8 x 3 5/8
Kraft cardstock:
(3) 3 3/4 x 3 3/4
(4) 1 3/4 x 3 3/4
White cardstock: (1) 12 x 12 Scoring: 2, 4, 8, 10 Flip score @ 4, 8
(1) 3 5/8 x 3 5/8
Kraft cardstock:
(3) 3 3/4 x 3 3/4
(4) 1 3/4 x 3 3/4
Pattern paper: Blue Christmas Paper Pack
(4) 1 5/8 x 3 5/8
(2) 3 5/8 x 3 5/8
Scraps for die-cutting
Until next time friends!!

Don’t forget to follow me on Instagram, YouTube, Pinterest, and if you want to connect with me, even more, come see my facebook page!


Comments
Post a Comment
Thank you so much for your kind comments!