Peony Bridal Bouquet Tag Tutorial ~ Aurora Wings Showcase
[vc_row][vc_column][vc_column_text]
Hey all! Today is a wonderful day for an Aurora Wings new release over at the Showcase Blog! Today the beautiful image I am working with is Peony Bridal Bouquet. I really enjoyed coloring this beauty! It was so nice and relaxing!
I don't know anyone that is getting married, but I really feel this would be a beautiful tag for a wedding gift.

I am sick right now (don't worry just a sinus infection), so since I didn't do a lot of the images right now because of low energy I decided to take photos while I was making the tag so I could treat you to that. The dies that I used you can do the same thing with any of the dies you have.

I really hope you enjoy the tutorial
The sentiment that I used is from a bride set that I have. I just really love this bouquet.
The Copic colors I used are:
Peony: R81, 85, 89, W7
Leaves: YG25, 23, 21
Binding Ribbon: E40, 41, 43
Shadow: C0
Now yet more awesome stuff!!


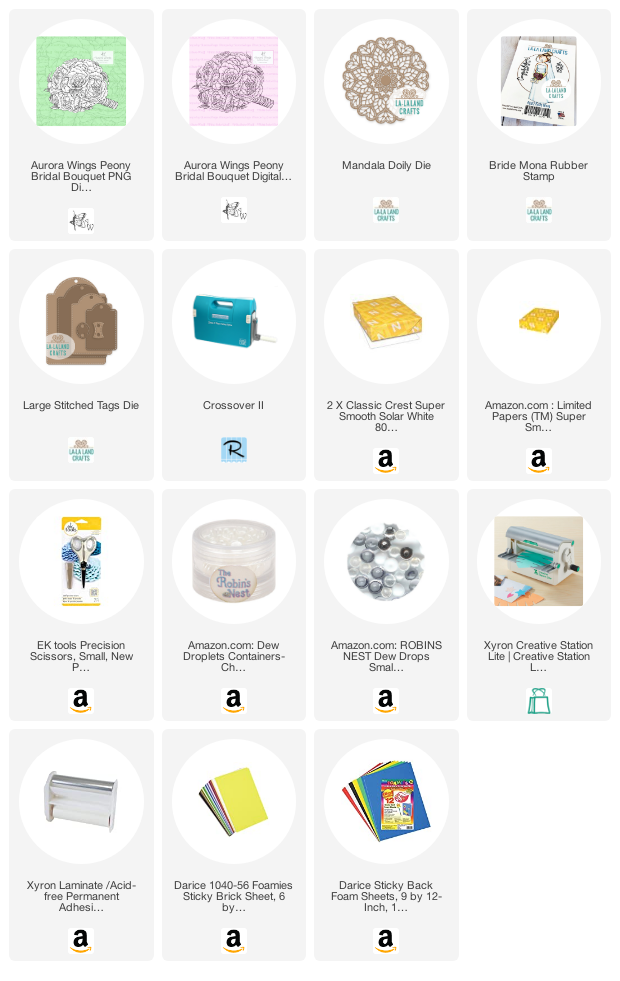
Here are the supplies I used for this tag:
Be sure to go over to the Aurora Wings Showcase blog for more inspiration from the team for this image and the others released today.
If you do make anything with this stamp or anything from Aurora Wings please feel free to share them with the Aurora Wings Facebook Group! You would not believe the inspiration in the group! Please if you are not already in the Aurora Wings group go and join, you won't be sorry. You are missing out for sure by not being in it!
Until next time friends!!!

Remember to sign up to get my blog so you don't miss any of my posts.
You can also follow me on Instagram, Pinterest, YouTube, and if you want to connect with me, even more, come see my Facebook page
[/vc_column_text][/vc_column][/vc_row]
Hey all! Today is a wonderful day for an Aurora Wings new release over at the Showcase Blog! Today the beautiful image I am working with is Peony Bridal Bouquet. I really enjoyed coloring this beauty! It was so nice and relaxing!
I don't know anyone that is getting married, but I really feel this would be a beautiful tag for a wedding gift.

I am sick right now (don't worry just a sinus infection), so since I didn't do a lot of the images right now because of low energy I decided to take photos while I was making the tag so I could treat you to that. The dies that I used you can do the same thing with any of the dies you have.

I really hope you enjoy the tutorial
 | After coloring the beautiful Peony Bride Bouquet, I cut it out using the second largest of the La-La Land Crafts Large Stitched Tags Die |
 | I then cut two more of the same size Large Stitched Tag Die in Sea Foam Green cardstock. I cut one in half horizontally. The other I cut vertically, then cut the top of the tag off. |
 | I then cut a La-La Land Crafts Mandala Doily Die out of Melon Mambo cardstock. After getting it die cut I cut it in half down the middle. |
 | My first step after getting everything cut was to adhere the two sides of the Mandala Doily Die on the edges of the main white tag with 3D foam |
 | I threw away the top of the Sea Foam Large Stitched Tag that I cut vertically and added mono adhesive to the fronts |
  | I then adhered the Sea Foam pieces to the back of the tag as shown in the photos. You will see in the second photo that just the edge is showing over the side from the front. Do this with both pieces on both sides. |
 | Now comes the Sea Foam Large Stitched Tag that I cut Horizontally. I added some mono adhesive. |
  | I did the same thing here as I did with the ones that were cut vertically. Only you are putting them on the top and on the bottom. |
 | After getting it all together you just have to add your sentiment and your ribbon. |
The sentiment that I used is from a bride set that I have. I just really love this bouquet.
The Copic colors I used are:
Peony: R81, 85, 89, W7
Leaves: YG25, 23, 21
Binding Ribbon: E40, 41, 43
Shadow: C0
Now yet more awesome stuff!!
Here are the supplies I used for this tag:
Be sure to go over to the Aurora Wings Showcase blog for more inspiration from the team for this image and the others released today.
If you do make anything with this stamp or anything from Aurora Wings please feel free to share them with the Aurora Wings Facebook Group! You would not believe the inspiration in the group! Please if you are not already in the Aurora Wings group go and join, you won't be sorry. You are missing out for sure by not being in it!
Until next time friends!!!

Remember to sign up to get my blog so you don't miss any of my posts.
You can also follow me on Instagram, Pinterest, YouTube, and if you want to connect with me, even more, come see my Facebook page
[/vc_column_text][/vc_column][/vc_row]
I love the tutorial of this gorgeous tag, Cristena! It's always fun to read through a post with lots of pics, and I love tut format. I love your sense of color with the shades of rose pink and the bright greens. Thank you for this stunning tag for today's showcase. Stay safe and creative! M xxx
ReplyDelete